October 13, 2026
How to Make a MOV File Smaller on iPhone (Fast)

Changing a MOV filename to something else won't make it smaller. Actual size drops come from trimming duration, lowering resolution, lowering bitrate, or re-encoding the codec, and a switch from H.264 to HEVC can often cut the file by roughly 30–50% when the source and settings cooperate.
That's the part that often gets missed when an iPhone is full and the next video won't record, or when a big clip refuses to send. A MOV file is usually just the wrapper, not the reason it's huge, so the trick is to change what's inside it.
Table of Contents
- Why Your MOV File Is So Big in the First Place
- HEVC vs H.264 and When Each Codec Wins
- Compress an Existing MOV Right on Your iPhone
- Desktop Compression Settings That Work
- Bitrate, Resolution, and Frame Rate Trade-Offs
- Common MOV Compression Mistakes to Avoid
- Pick the Right Path and Get Your Storage Back
Why Your MOV File Is So Big in the First Place
A full camera roll creates a specific kind of panic. The iPhone says storage is almost gone, the last vacation clip will not fit in Messages, or a work video bounces from email because the attachment is too heavy. The fix depends on what is making the file large, not on the .mov extension itself.
The container is not the compression
MOV is a container, which means it holds video and audio data, but it is not the compression method. Apple's QuickTime container can carry different codecs, so renaming the file does not change the bytes inside it. The main size drivers are the codec, plus the clip's resolution, frame rate, bitrate, and duration. Apple's own guidance shows that High Efficiency uses HEVC, also known as H.265, while Most Compatible records with H.264, and HEVC usually uses less storage for video that looks the same Apple Camera Formats.
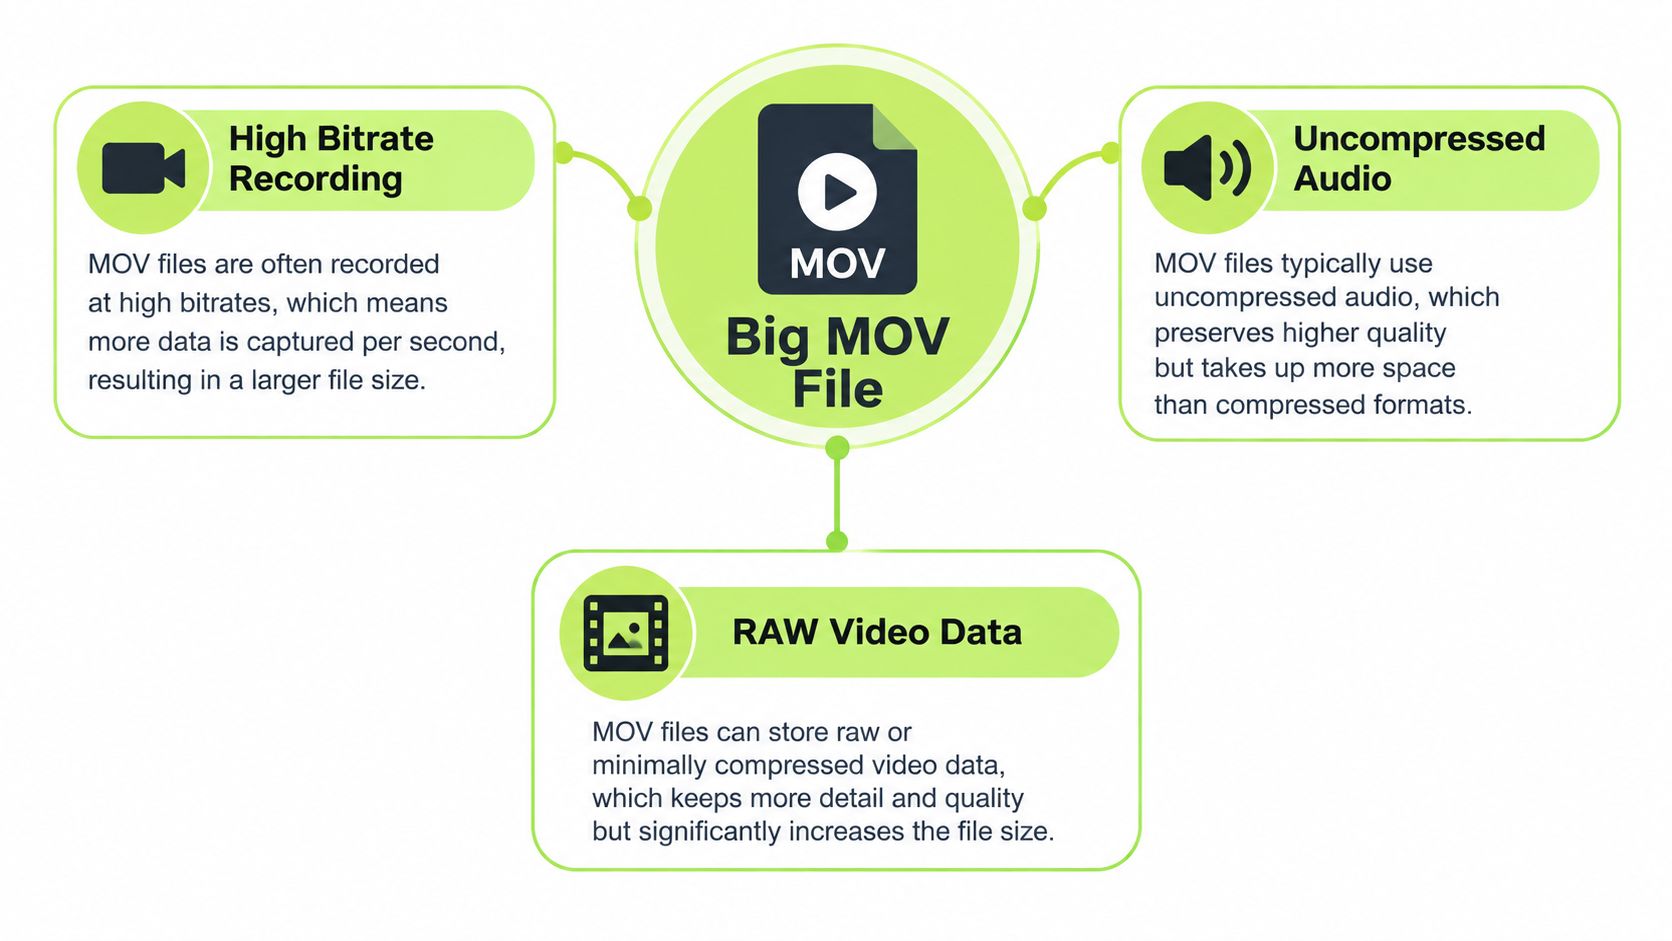
A quick mental model helps here. Bitrate controls how much data gets written per second, duration controls how many seconds there are to store, and resolution controls how many pixels each frame contains. Higher bitrate and higher resolution usually mean a bigger file, while a longer clip is just more video to hold onto. Apple also notes that ProRes files can be up to 30 times larger than HEVC files, which is why a ProRes MOV can dwarf a regular phone recording Apple ProRes support.
Lowering capture resolution in Settings > Camera > Record Video is one lever. Understanding what video compression actually does explains the other. You can record fewer pixels, or keep the same look by using a more efficient codec, but the trade-off changes how easy the file is to share and how much detail survives later edits.
The three native ways to shrink a video
The easiest first move is trimming in Photos. Open the clip, tap Edit, drag the start and end handles, then tap Done. From there, Save Video replaces the original with the shorter version, while Save Video as New Clip keeps both copies. That difference matters when the original still needs to exist somewhere.
Practical rule: if the first five seconds are dead air or the end has extra footage, trimming is usually the fastest real win.
A second lever is recording resolution. In Settings > Camera > Record Video, lower the capture resolution for future clips. That does nothing to old MOV files, but it makes the next recordings lighter from the start. Apple also recommends choosing a resolution below 1080p HD when the goal is smaller files Apple video storage tips.
The third native route is switching Camera Formats from Most Compatible to High Efficiency. That tells the iPhone to record new videos in HEVC instead of H.264, which is the simplest long-term storage saver for people whose devices and sharing destinations support it. For a typical overflowing-camera-roll situation, the order is usually clear, trim first if there is wasted footage, use High Efficiency for ongoing savings, and lower resolution only when you are intentionally trading detail for space.
HEVC vs H.264 and When Each Codec Wins
Once the file is already on the phone, the codec matters more than the MOV wrapper. MOV is just the container. HEVC and H.264 can both sit inside it, but they handle size and compatibility very differently.
The simple trade-off
HEVC, also called H.265, is the better choice when smaller files matter most. Apple says HEVC can produce files up to 40% smaller than H.264 at comparable visual quality. That is why High Efficiency on iPhone uses HEVC. In practice, a clip can keep the same look and still leave a lot more room free on the device.
H.264 wins when playback needs to be boringly reliable. Older hardware and software tend to open it more easily, and Apple notes that HEVC support varies by device, resolution, and frame rate. It also says 1080p or lower at 60 fps or lower is more broadly compatible. That is the safer choice for an older laptop, a random upload tool, or any share where you do not control the receiver's setup.
If the destination is uncertain, use the codec most likely to play. If the destination is modern, use the codec that saves more space.
A lot of people try to solve every MOV problem with one export setting. That usually backfires. The right pick depends on whether the clip stays on the phone, goes to a family member's device, or needs to sit in an archive without causing headaches later.
What that means in practice
For a quick share to someone with a newer iPhone, HEVC is usually the cleaner choice. For a video that has to open almost anywhere without drama, H.264 is the safer fallback. If compatibility is still in doubt, lowering the resolution can help a file play where HEVC might not.
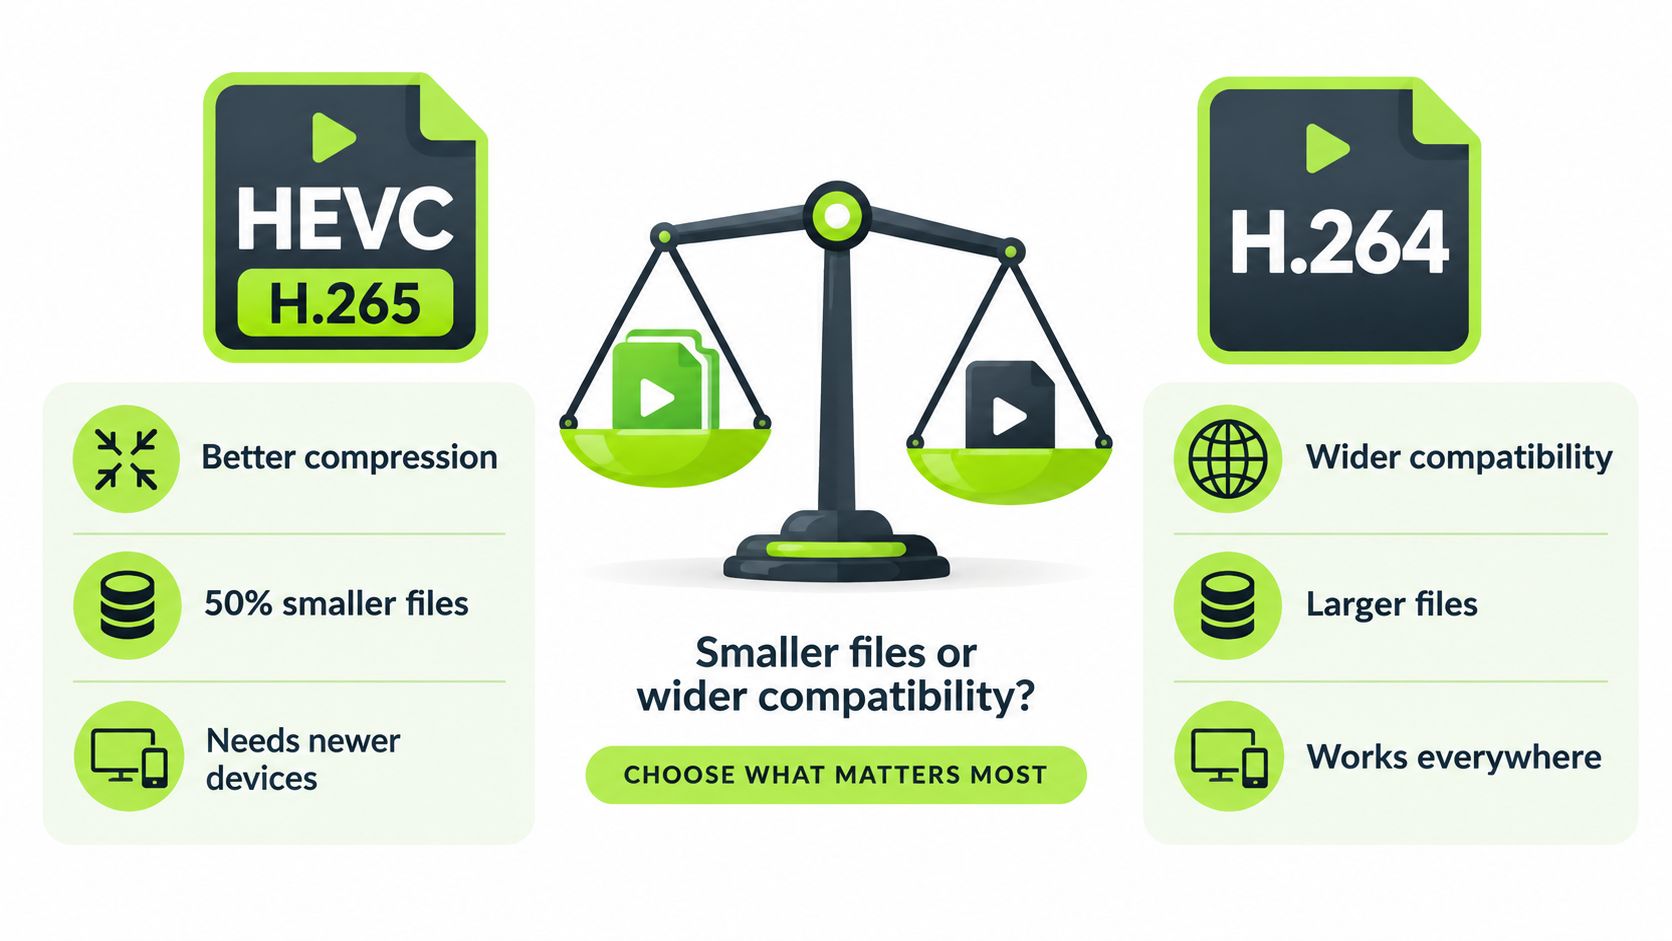
The trade-off is that every re-encode takes time and can shave off a little quality. A file that is already compressed well should not be recompressed unless there is a clear reason.
Compress an Existing MOV Right on Your iPhone
When a MOV is already on your iPhone and that is the only place it needs to live for now, the cleanest move is to compress it on-device. You skip the upload, wait, download cycle, and you keep control over what changes.
A local workflow that keeps the file on the iPhone
LuminaClean scans on the iPhone, finds large videos alongside duplicates, similar photos, blurry shots, and screenshots, and lets you compress video without sending the file to a cloud service. It does not need an account, and nothing gets deleted unless you swipe or confirm it. Deleted items then follow iOS's Recently Deleted recovery period, which Apple says gives you time to restore them before they are removed from the album Apple Photos support.
If you are not sure which clips are worth compressing first, start with a guide to choosing an iOS video compressor like this one from LuminaClean. Then open the app, let it scan locally, pick the large MOV, choose a compression level, and review the estimated savings before you confirm. LuminaClean includes free video compression, starts with 65 free deletes, then adds 10 more every day, with an optional Premium subscription for clearing a bigger backlog at once. That setup is useful when you want to free storage fast without moving the file off the phone.

A few App Store compression tools use a more traditional export flow. You choose output quality, save a new file, and keep going. That works well if you already know the codec you want or you need a one-off shareable copy, but it is a different job from reviewing a large file on the phone while keeping everything local.
For a quick storage rescue, on-device compression is the least fussy option because the phone never has to hand the video off to a server. If you need a share-ready export with a specific codec target, the desktop route below gives more control.
Desktop Compression Settings That Work
Some MOV files need a heavier hand, especially ProRes footage or clips that have already been exported once and still end up too large. In that case, better results usually come from choosing the codec and quality settings directly instead of relying on a one-tap preset.
A command that gives real control
FFmpeg is the engine behind a lot of video tools, and it can re-encode MOV into HEVC with a practical quality target. A common starting point is:
ffmpeg -i input.mov -c:v libx265 -crf 28 -preset medium -c:a aac -b:a 128k -tag:v hvc1 output.mov
That command keeps the MOV container, switches the video to HEVC/H.265, and sets audio to AAC. CRF 28 is a common starting point for HEVC, and raising it toward 30 to 32 usually shrinks the file more at the cost of detail, while lowering it toward 24 to 26 pushes quality up and file size up with it FFmpeg H.265 guide.
Useful rule: use a lower CRF when the file is going back into editing, and a higher CRF when the clip is just for sharing.
The -preset setting changes speed versus compression efficiency. Slower presets usually squeeze out smaller files at the same quality, but they take longer to finish. The hvc1 tag helps Apple playback environments recognize the file correctly.
What to expect from a good encode
A single good HEVC pass can shrink a large H.264 master a lot, but it will not erase the file size problem entirely. The important part is to preserve enough detail that the next playback or share step does not make compression artifacts worse. Re-encoding the same clip over and over is where files start looking soft, blocky, or noisy in motion.
For people who prefer a phone-first workflow, the same decision still applies in simpler form. Compress on the iPhone when privacy and convenience matter most, keep HEVC when the destination supports it, and save H.264 for broader compatibility.
Bitrate, Resolution, and Frame Rate Trade-Offs
A MOV file is just the container. The size and quality choices come from the codec settings inside it, and those choices usually come down to bitrate, resolution, and frame rate.
The three knobs that matter most
File size tracks bitrate closely, so lowering bitrate usually lowers the video portion of the file by a similar amount before audio and container overhead are added Grid encoding study. That is why bitrate is usually the first setting to change if a clip is too large for Messages, email, or local storage.
Resolution changes the amount of image data in a clip very quickly. A 4K to 1080p conversion cuts each dimension in half, which leaves one-quarter as many pixels per frame. The file will not always shrink by exactly the same proportion, because motion and encoder efficiency still affect the result, but the direction is clear.
Frame rate is the third lever. Dropping from 60 fps to 30 fps can cut down on temporal detail that many everyday clips do not need, especially if the footage does not depend on very smooth motion. The same encoding study points in that direction as well, and the practical trade-off is simple, lower frame rate can mean easier sharing and less storage use, while fast action may look less fluid.
Start with bitrate, then frame rate, then resolution if the destination can tolerate it.
Audio is usually not the best place to chase extra savings. If the track is already in a normal compressed format, the gains are small compared with changes to the video stream. Repeated lossy exports are the core problem, because each extra pass can add blockiness, soften motion, and make skin tones or texture look worse.
Common MOV Compression Mistakes to Avoid
Bad advice about MOV files spreads fast because it looks simple. Rename the file, upload it somewhere, click compress, and move on. The problem is that the easy-looking fixes usually skip the part that changes the video.
Renaming the extension does nothing
Changing .mov to .mp4 does not shrink the file on disk. The bytes stay the same, and the container may no longer match the codec, which can make the file harder to play instead of easier. If the goal is smaller size, the file has to be trimmed or re-encoded, not just relabeled.
Upload-first compressors have a privacy cost
Online compressors ask the user to upload the clip before anything happens. That adds time, breaks the on-device privacy model, and hands a personal video to a server that the user can't directly verify afterward. For family clips, work footage, and anything sensitive, that trade-off is hard to justify.
Smaller is not always better
A crushed file often survives the next re-encode worse than a moderate HEVC export. Share apps, messaging tools, and social platforms can recompress the video again anyway, so over-compressing too early just gives those services a worse source to work from. A balanced export is usually the smarter starting point.
One more trap is repeated re-encoding. Each lossy pass can soften motion and create blocky edges, especially in footage with movement, noise, or detail. A better workflow is to shrink once, verify the result, and keep the original until the new copy is confirmed.
Pick the Right Path and Get Your Storage Back
The right answer depends on the job in front of the phone. A storage emergency, a shareable export, and an archive-quality reduction each need a different tool, and trying to force one setting to do all three usually wastes time.
Match the method to the job
For a phone that's full right now, the fastest move is an on-device compressor plus a cleanup pass through Recently Deleted. That handles the immediate space problem without sending the video out to a server, and it fits well with finding other big clips on the device through a scanner like LuminaClean's large-video finder.
For a clip that needs to go into Messages, email, or a social app, trimming plus a moderate HEVC export is the safer balance. It removes dead weight, keeps quality decent, and gives modern devices a smaller file to work with. For a video that needs to stay archived but lighter, FFmpeg with CRF 24 to 26 is a better quality-first shrink than an aggressive low-bitrate export.
The setting worth flipping for future recordings is still Camera Formats > High Efficiency. That makes new videos start out smaller by default, which means less cleanup later and fewer surprises when storage gets tight again.
A simple ten-minute checklist helps: trim obvious dead space, switch future recording to High Efficiency, compress the largest existing MOV on the phone, empty Recently Deleted when the recovery window allows, and keep the original until the smaller copy opens cleanly on the device that matters.
Clean up your camera roll in minutes.
LuminaClean scans on-device, groups duplicates, similar shots, screenshots and blurry photos, and deletes only what you confirm. Free to start, no account.